Frontend and Backend Development with Big Idea 1 Review


- Installing Scripts Lesson
- Setting up GitHub Pages with FastPages Features
- How to Make a Pull Request
- Fetching
- Third Party APIs
- Pandas
- Python (Request) Fetch
- Hacks and Point Division
- Hacks
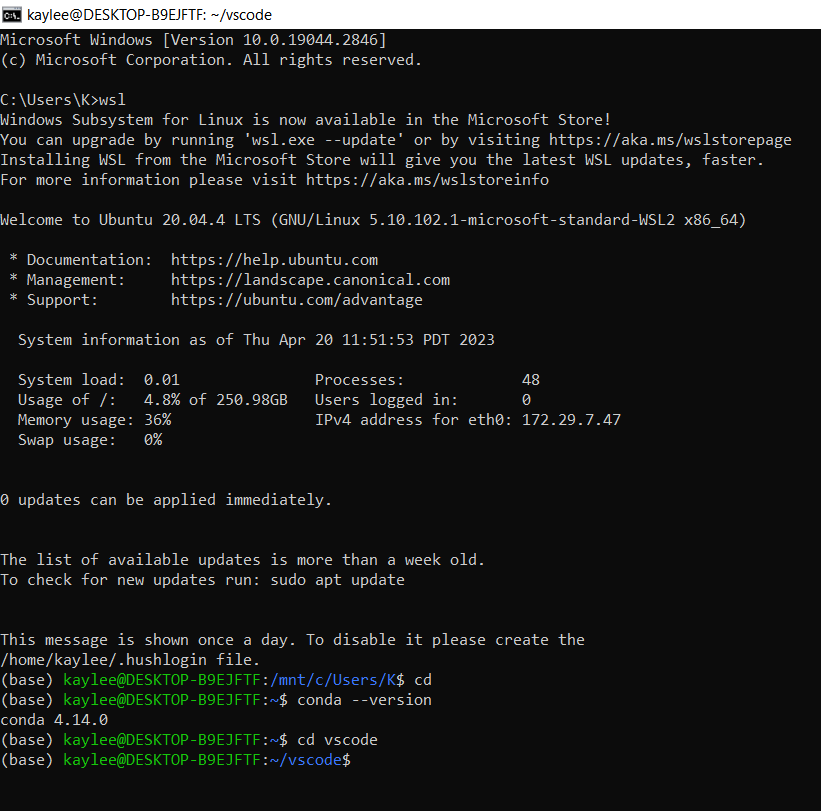
- Screenshot showing proof that conda is installed (.1)
- Create 3 quiz eustions to demonstrate the main steps in creating a repository on github (.1)
- Fetch from a third party API, and display json data. Then use the json data in any simple JavaScript function (hint: parse, this makes json data into a JavaScript object) (.4)
For Windows
After you've installed VSCode using WSL, install Anaconda on WSL.
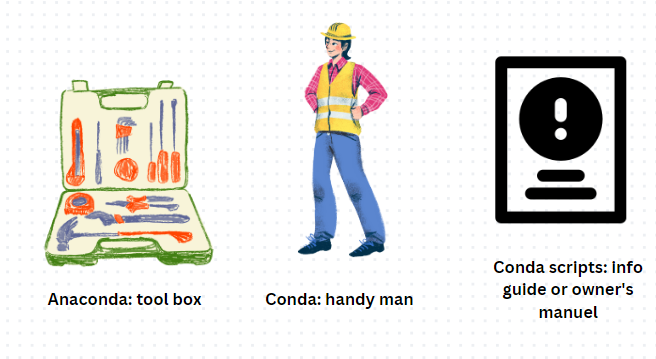
Anaconda is like a big tool box for your computer, it has tools and libraries that you might need for data analysis, programming, and computing. Anaconda Python packages include pandas, numpy, sqlite, jupyter, bash, and other kernels. Conda is a tool that helps you manage these tools inside Anaconda. It lets you install, update, delete, and organize packages and materials. Conda script tells Conda what tools and materials you need and how to install them in your Anaconda toolbox.
Type these commands in powershell or terminal
PS C:\Users\UserName> wsl  # Windows prompt to WSL command
$ cd /tmp # used to store temporary files
$ wget https://repo.anaconda.com/archive/Anaconda3-2023.03-Linux-x86_64.sh # downloadable file
$ chmod +x Anaconda3-2022.05-Linux-x86_64.sh # chmod (change mode command) changes permissions for a file or directory
# Answer yes to all the prompts
$ ./Anaconda3-2022.05-Linux-x86_64.sh
Start a new WSL Command or Powershell. Now the WSL prompt should be prefixed with (base) from Anaconda install. If not, go back to Anaconda install. The base prefix indicates that you are running inside the conda/anaconda environment. The command "conda deactivate" should bring you back.
PS C:\Users\ShayM> wsl  # Windows prompt
(base) shay@MSI:/mnt/c/Users/ShayM$ cd ~ # WSL prompt
(base) shay@MSI:~$ # WSL home, best place to install files

# you can check your conda versions
(base) id:~$ conda --version
For MacOS
Python2 install on MacOS
- Install Python2> VSCode install on MacOS.
- Install VSCode> Anaconda install on MacOS.
- Download for MacOS:Anaconda- Run Install: Answer yes to questions Homebrew install on MacOS
- Homebrew is a tool that helps you easily install and manage software on your Mac. Think of it like a virtual store for your computer where you can browse, download and install a variety of useful programs and tools.
- Copy and Paste to Install from Terminal Homebrew - Copy
bash ... curl ...command using copy box on website
- Launch
terminalfrom search bar- Paste
bash ... curl ...command into Terminal ...- Make sure command starts, this should provide feedback/output in terminal and could take a long time, like 10-min, there could be a prompt in the middle, at about 5-minutes. Follow any on screen instructions provided in terminal output to finish.
- Homebrew installs a tool called "brew" which helps add and manage developer packages on MacOS.
Start a new WSL terminal. Now the terminal prompt should be prefixed with (base) from Anaconda install. If not, go back to Anaconda install.
Having Homebrew and Anaconda allows you to easily install Key Packages needed on MacOS like the commands below are all neccessary:```bash$ brew list # list packages $ brew update # update package list $ brew upgrade # upgrade packages $ brew install git # install latest git $ brew install python # install python3 for development $ python --version # version of python3 installed $ brew install java # openjdk install
- Hacks: Screen shot that you have conda installed
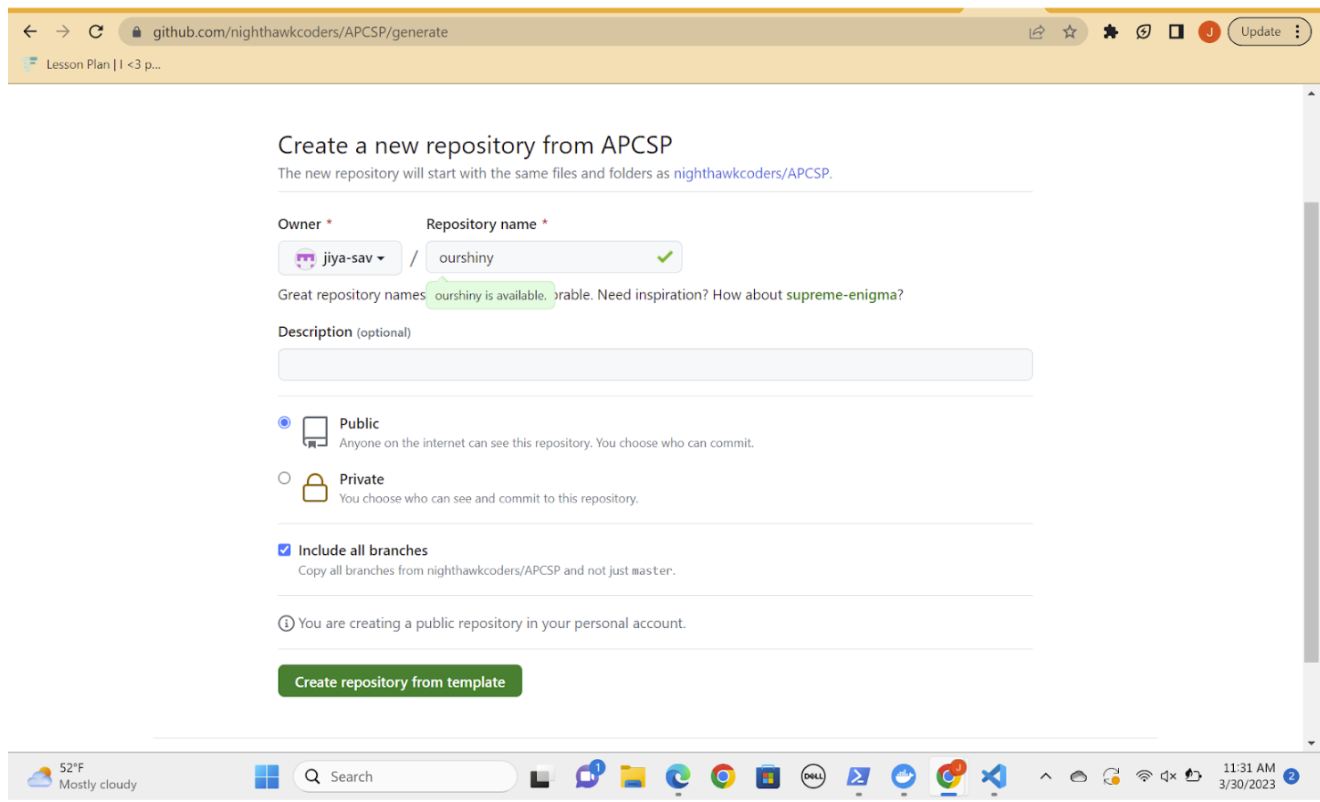
- Duplicate APCSP, and use it as template for your own repo

- Name your repo and include all branches before clicking the green create button.
- If you have an automatically generated pull request, then go ahead and follow the instructions on there. If there is no pull request, as shown below, then move on to step 4.

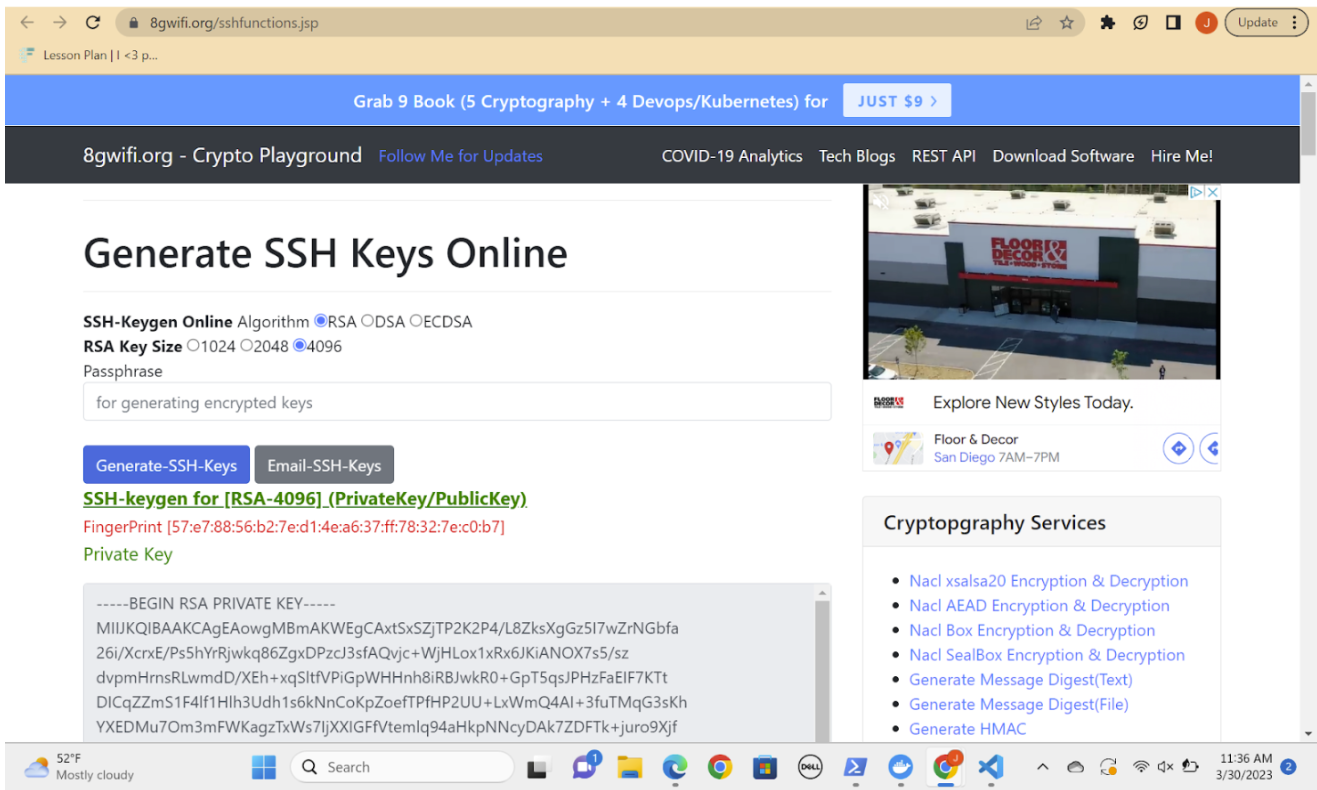
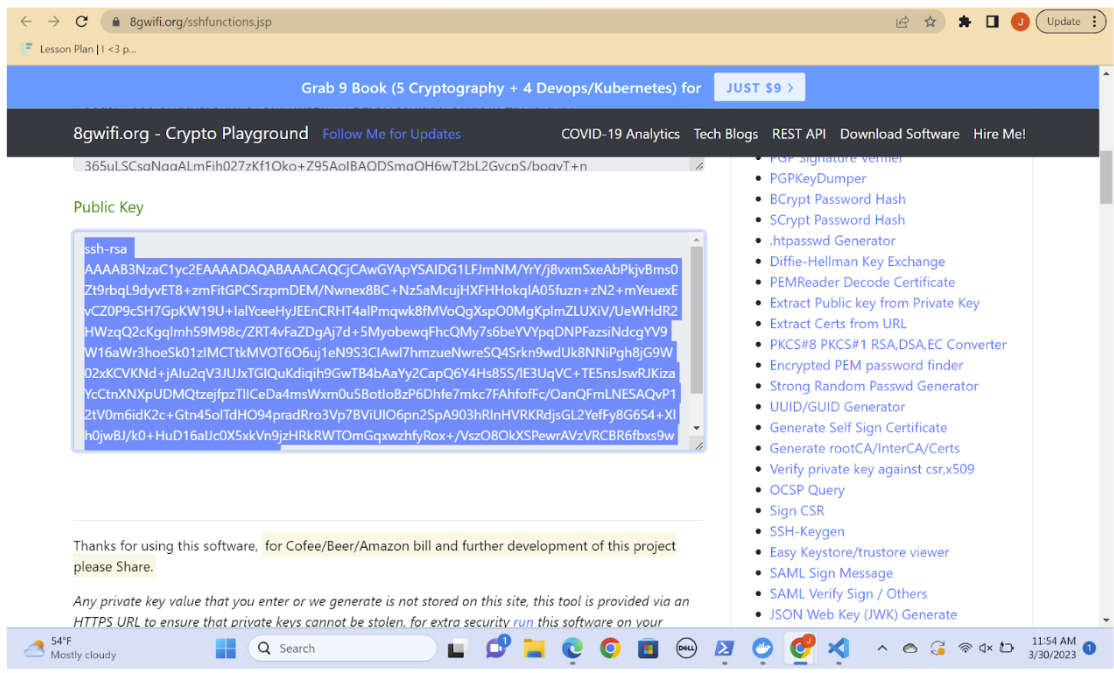
- Navigate to this link. Select: RSA and 4096 and leave Passphrase blank. Click the blue button Generate-SSH-Keys. You have just created an ssh key-pair.
- Navigate to this link. Replace the section of the link "yourrepositoryname" with your repository name. In the picture, I have inputted “ourshiny,” because it is my repository name. Replace the section of the link "yourgithubname" with your repository name that you just made. https://github.com/yourgithubname/yourrepositoryname/settings/secrets/actions
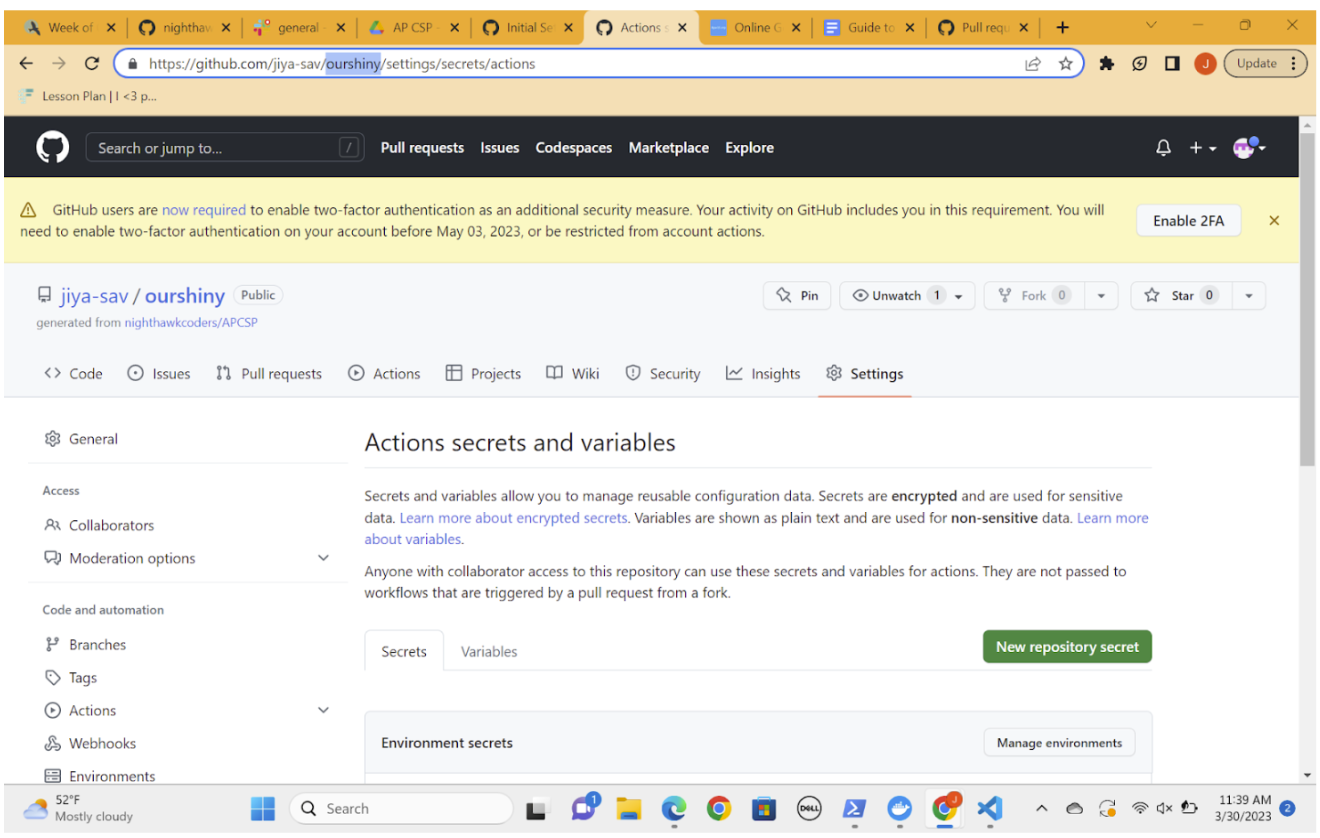
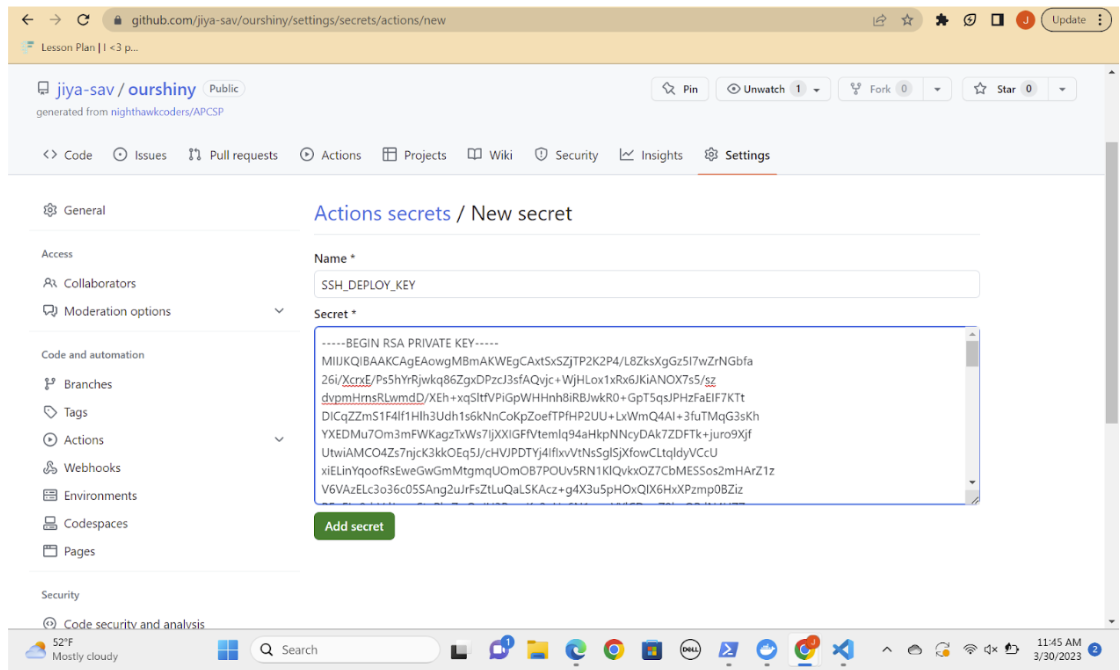
- Click New repository secret. Copy and paste the Private Key (generated in step 4) into the Value field. This includes the "---BEGIN RSA PRIVATE KEY---" and "--END RSA PRIVATE KEY---" portions. In the Name field, name the secret SSH_DEPLOY_KEY. Once done, click the green Add Secret button.
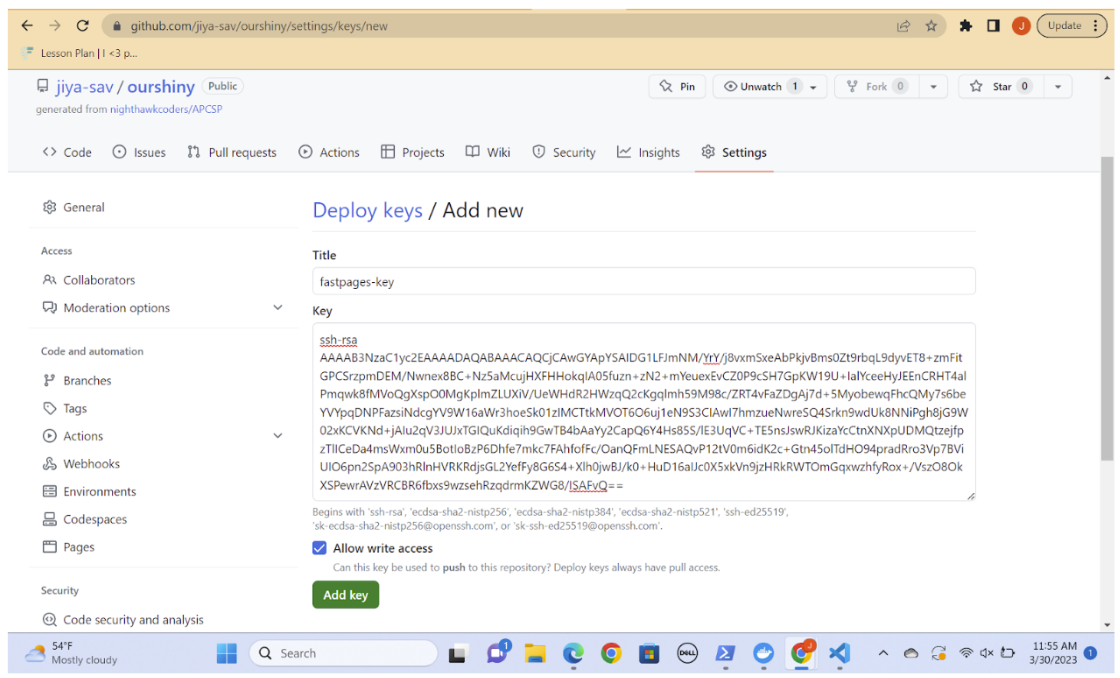
- Navigate to this link, then replace the portions below with your github and repository names. My github name in the image below is jiya-sav, and my repository name is ourshiny. https://github.com/yourgithubname/yourrepositoryname/settings/keys

- Click the Add deploy key button. Paste your Public Key (generated in step 4) into the Key box. In the Title, name the key anything you want, for example fastpages-key. Finally, make sure you click the checkbox next to Allow write access (pictured below), and click the green Add key button to save the key.
- GitHub Actions will build your site, which will take 2-3 minutes to complete. This will happen anytime you push changes to the master branch of your repository. You can monitor the logs of this if you like on the Actions tab of your repo. Your GH-Pages Status badge on your README will eventually appear and be green, indicating your first successful build. You can monitor the status of your site in the GitHub Pages section of your repository settings.
Now that you have made your repository secure, you can clone it into vscode and CODE, CODE, CODE!!!
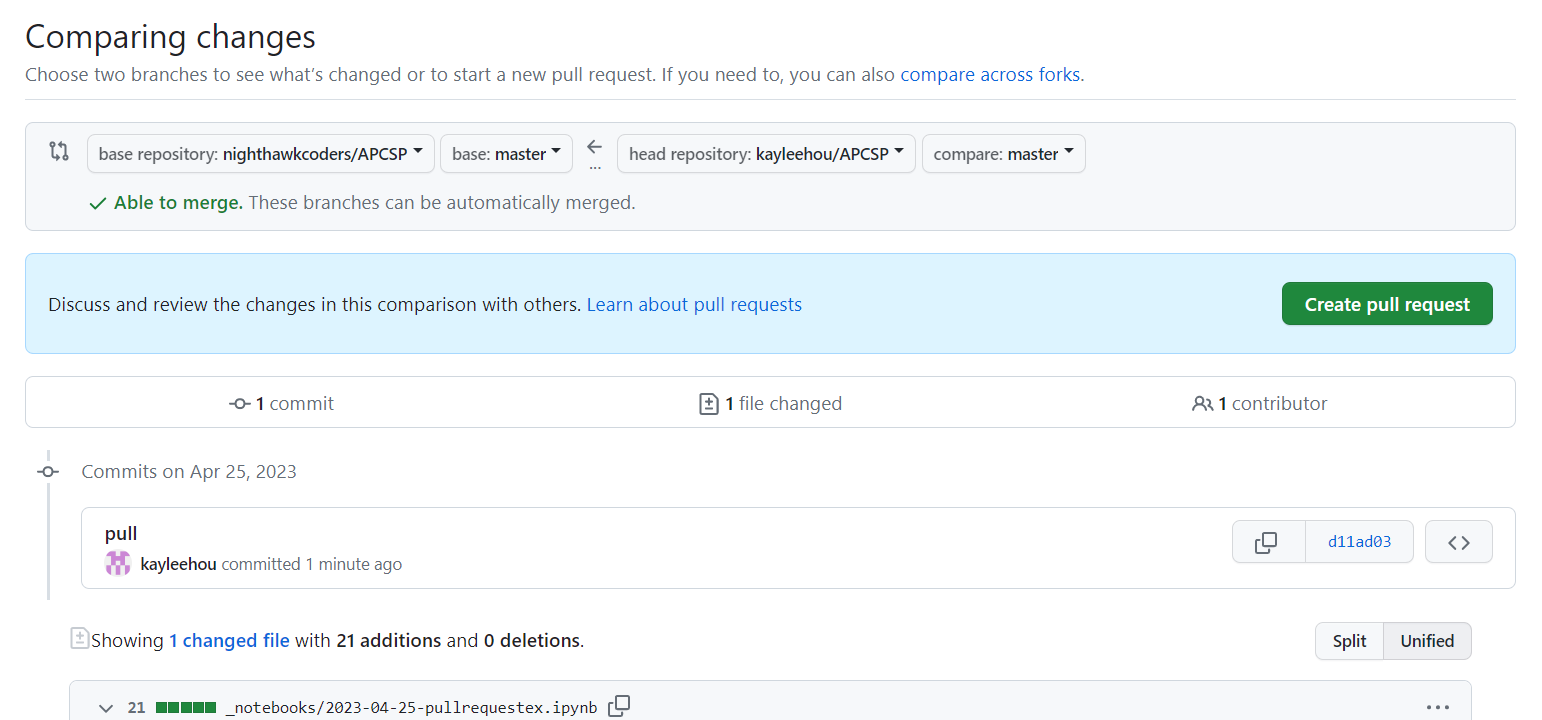
How to Make a Pull Request
-
After you've cloned a repository and made changes to it, go to pull requests in your Github repository

-
Once you click 'create new pull request,' you should see this with your new changes:
-
Change the title and send the pull request
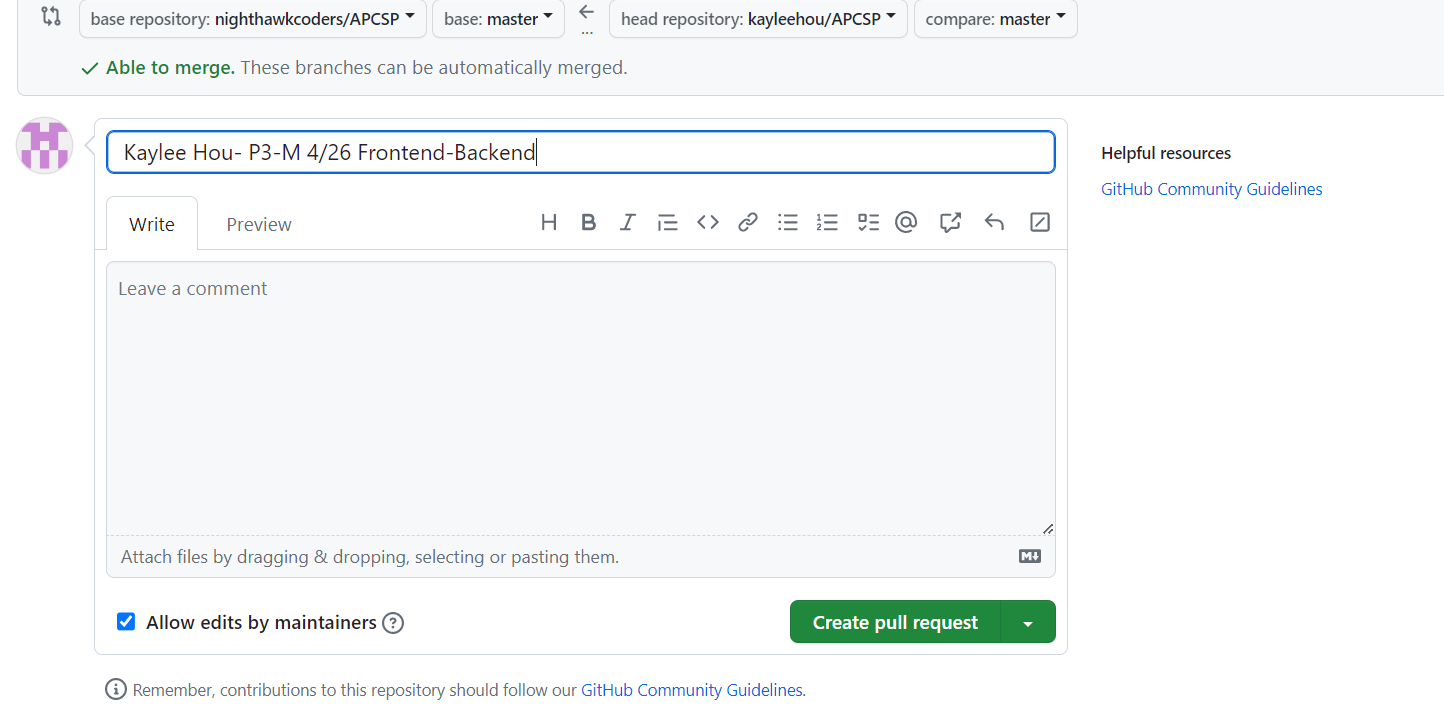
- Hacks: You will be turning in all your hacks as a pull request. Title the pull request as shown in the third step but with your own name. Any other titles will not be accepted.
Fetching
The Basics
- Fetching means getting data from somewhere else, like a website or database.
JavaScript is a programming language that can be used to fetch data from a website or database.
- When you fetch data with JavaScript, you first need to tell it where to get the data from. This is called the URL.
- Once you know the URL, you can use JavaScript to go and get the data from that URL.
- When the data comes back, it's usually in a format like text or JSON. This means that you might need to do some additional work to turn the data into something that your website or application can use.
- Once you have the data, you can use JavaScript to display it on your website or application. You can put it in a table, show it on a map, or do anything else you can think of.

About Fetching
Method
The fetching methods are in line with the CRUD (Create, Read, Update, Delete), and list as follows:
- "GET": Probably the most common method you would use, which is in line with "read". It essentially "gets" the information from the API and brings it to the frontend where you are able to display it and read it.
- "POST": Lines up with "create" and adds a resource to the API. You will probably mostly be using this with your own API or if a website adds your input to an API.
- "PUT" and "PATCH": Essentially the "update" for API. Use "PUT" if you want to change the whole resource, or "PATCH" if you want to change just one part of a resource.
- "DELETE": Exactly how it sounds, deletes a resource from the API
Popcorn Hacks:
- What method should I use if I want to display some of the data stored in the backend?
GET
- What method would I use if something in the data is misspelled and I want to fix it real quick?
PUT
- What method should I use if I want to add a new entry to the data?
POST
Filtering Data
- If we want to display API data, we are going to have to filter what we want to display for multiple reasons
- These include making sure that the user only sees information they need to see, and not anything else
- Also we need to present the information in a readable format instead of just seeing the raw data
The below code segment, is from a previous project. It shows the use of a url being fetched, and the JavaScript fetch() command being implemented.
// prepare fetch urls
  // const url = "https://ssjn.nighthawkcodescrums.gq/api/song";
  const url = "https://ssjncpt.duckdns.org/api/song";
  const sad_url = url + "/sad/";  // sad category
  const happy_url = url + "/happy/";  // happy category
  const rage_url = url + "/rage/";  // rage category
  const indian_url = url + "/indian/"; // indian category

  // prepare fetch GET options
  const options = {
    method: 'GET', // *GET, POST, PUT, DELETE, etc.
    mode: 'cors', // cors, *cors, same-origin
    cache: 'default', // *default, no-cache, reload, force-cache, only-if-cached
    credentials: 'omit', // include, *same-origin, omit
    headers: {
      'Content-Type': 'application/json'
      // 'Content-Type': 'application/x-www-form-urlencoded',
    },
  };
  // prepare fetch PUT options, clones with JS Spread Operator (...)
  const put_options = {...options, method: 'PUT'}; // clones and replaces method

  // fetch the API
  fetch(url, options)
    // response is a RESTful "promise" on any successful fetch
    .then(response => {
      // check for response errors
      if (response.status !== 200) {
          error('GET API response failure: ' + response.status);
          return;
      }
      // valid response will have JSON data
Third Party APIs
-
APIs provided by other developers for public use.
-
Programmers can use the content of these APIs to create new functionalities for their programs, or they can also simply take advantage of the data of the API for different uses.
-
Ex: A developed can use Google Account login to allow users to log in with their google account
-
Ex: Using the content of a weather API to make a weather app
-
-
The functionalities of these APIs are usually accessed via JavaScript (usually) as you’ve seen before in your past projects.
-
3rd party APIs are located on third party servers. To access them from JavaScript you first need to connect to the API functionality and make it available on your page.
<script src="https://api.mqcdn.com/sdk/mapquest-js/v1.3.2/mapquest.js" defer></script>
<link  rel="stylesheet"  href="https://api.mqcdn.com/sdk/mapquest-js/v1.3.2/mapquest.css" />
- Here is an example of accessing the objects available in the library above.
const map = L.mapquest.map('map', {
    center: [53.480759, -2.242631],
    layers: L.mapquest.tileLayer('map'),
    zoom: 12
  });
- The process of accessing and using third-party APIs can vary depending on the specific API and the requirements set by the API provider. 3rd party APIs use developer keys to allow developers access to the API functionality, which protects the owner of the API.
L.mapquest.key = 'YOUR-API-KEY-HERE';
- Developers must apply to get the key of a certain API, and then include it in their code to be allowed access to the API's functionality. Some API keys are accessed slightly differently, but the method is similar for the most part.
Put the link of a 3rd party API you have or will use below?
Weather App Project: https://github.com/dolphinalt/Weather-App
API url: https://visual-crossing-weather.p.rapidapi.com/forecast
Pandas
While 3rd party APIs give you access to a plethora of data you may have not been able to include using a completely new self-made database, pandas can help you organize and utlize this data.
Pandas is an open-source library that allows for the manipulation and analysis of numerical data, which is vital in real-life applications.
We have used this in the song recommendation program we are currently developing. The use of pandas allows us to take the csv file we obtained from a third party and display it in a format we can manipulate and analyze.
import os
import pandas as pd
from flask import render_template

@app.route('/songdata')
def songdata():
    # Path to the CSV file
    csv_path = os.path.join(app.static_folder, 'songdata.csv')

    # Read the CSV file into a pandas dataframe
    df = pd.read_csv(csv_path)

    # Render the dataframe as an HTML table using Jinja2
    return render_template('songdata.html', table=df.to_html(index=False))
This is how the dataframe will appear on our flask:

import requests

url = "https://yahoo-weather5.p.rapidapi.com/weather"

querystring = {"location":"San Diego","format":"json","u":"f"}

headers = {
	"X-RapidAPI-Key": "4abcb54450msh7468dfd72294e89p18fbaajsn6d4200063b39",
	"X-RapidAPI-Host": "yahoo-weather5.p.rapidapi.com"
}

response = requests.request("GET", url, headers=headers, params=querystring)

print(response.json())
The fetch worked and we can see all the data, but this is presented in a way that is not very readable. It also has a lot of information we didn't see. Let's say I just want to see the projected weather forecasts.
import requests

url = "https://yahoo-weather5.p.rapidapi.com/weather"

querystring = {"location":"San Diego","format":"json","u":"f"}

headers = {
	"X-RapidAPI-Key": "4abcb54450msh7468dfd72294e89p18fbaajsn6d4200063b39",
	"X-RapidAPI-Host": "yahoo-weather5.p.rapidapi.com"
}

response = requests.request("GET", url, headers=headers, params=querystring)

print("San Diego Weather Forecast:" + "\n")
forecast = response.json().get("forecasts")
i = 0
while i < len(forecast):
	for key, value in forecast[i].items():
		print("\t" + key, value)
	i += 1
	print("\n")
As we can see, we now can see the data in a much more organized and readable format, and we only see the forecasts, which is what we wanted to see
Hacks and Point Division
- Popcorn questions answered within lesson (.2)
- Screenshot showing proof that conda is installed (.1)
- Create 3 quiz questions to demonstrate the main steps in creating a repository on Github (.1)
- Fetch from a third party API, and display json data. Then use the json data in any simple JavaScript function (hint: parse, this makes json data into a JavaScript object) (.4)
- In your code, comment on how you implemented a 3rd party API. Reflect on how using the 3rd party API helped.
- Pull request successful completion: (.1)
Extra: Use fetch() and display data from an API, self-made or third party (.1)
Hacks
Screenshot showing proof that conda is installed (.1)

Create 3 quiz eustions to demonstrate the main steps in creating a repository on github (.1)
1. What is the best way to get a copy of an existing github repository?

(A) Fork the repository
(B) Clone the repository
(C) Create a new repository and copy the files over
(D) Create a pull request

The correct answer is (B)


2. If I wanted to make a change to a friend's CSP project, what would I use to ask if they want to accept my changes?

(A) Fork the repository
(B) Clone the repository
(C) Create an issue in his repository
(D) Create a pull request

The correct answer is (D)


3. Which of the following best describes forking a repository?

(A) Making a branch of the repository in order to make your own changes separate too the main working branch.
(B) Creating a copy of the repository.
(C) Letting people know that there is an issue with the current code and asking for a fix.
(D) None of the above

The correct answer is (A)
Fetch from a third party API, and display json data. Then use the json data in any simple JavaScript function (hint: parse, this makes json data into a JavaScript object) (.4)
import http.client

conn = http.client.HTTPSConnection("visual-crossing-weather.p.rapidapi.com")

headers = {
    'content-type': "application/octet-stream",
    'X-RapidAPI-Key': "68b28d2802msh609f62c1192337dp1eca9ejsnb9175b996d5a",
    'X-RapidAPI-Host': "visual-crossing-weather.p.rapidapi.com"
}

conn.request("GET", "/forecast?aggregateHours=24&location=Washington%2CDC%2CUSA&contentType=csv&unitGroup=us&shortColumnNames=0", headers=headers)

res = conn.getresponse()
data = res.read()

print(data.decode("utf-8")) # the .decode function turns the json object into a printable string, similar to the .stringify json function in javascript

# This api helped me because it allows me to quickly and easily get weather conditions to use within my project, instead of needing to go and manually input the data myself.